With a few exceptions, most 1982-'85 Eldorado (and Seville) models running around are equipped with HT4100 engines. Even with the many small changes and improvements made each year to correct the myriad material and design weaknesses (the '83-'85 TSB book is entertaining reading on this), there are plenty of reasons you might want to swap in something a little more reliable or more powerful.
The cars that have survived tend to either have been well-maintained, or had corrective repairs/replacements performed years ago, so with a little TLC, they should continue to perform better than their reputation. I'll give them this, they're the smoothest V8 going. That said, even on the best day, the 135HP (83-85), 12.6 sec 0-60, is barely adequate motivation in one of these cars. Unlike their RWD counterparts, you can't just drop in a big block and THM400. But a satisfactory swap is still within reach if you're determined.... There's a lot to take in, SO THE SWAP GUIDE IS DIVIDED INTO 3 PARTS.
|
Part 1: 2. Parts 3. Donor Cars Part 2: Engine Removal & Installation (and Olds rebuilding tips) Part 3: Electrical Swap Section (warning lights, dash wiring mods, CC) |
 |
The biggest drawback to engine swapping a 4100 car is how to handle the integrated electronics. You'll lose Fuel Data either way, but you can still make Climate Control work, and there are workarounds for cruise control and torque converter lockup. You will find detailed info in the Electrical Swap Section. Also, See Here for a custom Fuel Data solution for '82-85 Eldos and Sevilles that gives you digital gauges as well as operates your torque converter and Coolant Temp light.
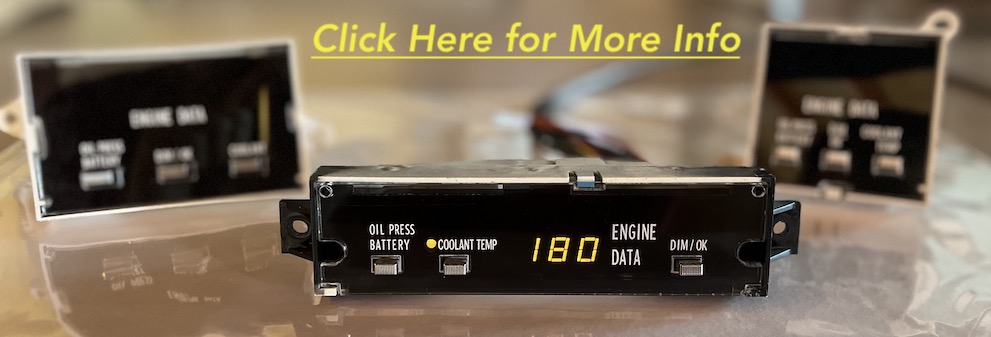 Make your old Fuel Data Panel Useful Again! |
There are several good engine options when doing a swap, with the Olds 307/350 being the most popular due to cost and availability. Most everything you need has already been made by the General in one form or another and is available if you look hard enough (more on that below).
If you're power-hungry, the stock trans will handle a 403 (w/shift kit), but anything larger is asking for trouble. Fuel Injection can be added, either with something aftermarket, or a DIY approach using a first-gen Seville intake and your electronics of choice, but for many a carb is just fine. If you really want to run a big block Olds or Cad, a trans upgrade to a THM-425 is required, and with that, custom mounting, firewall modification, custom half-shafts, cooling upgrades, and deep pockets. It can be done, but it's overkill. A 403 already has more power than can be reliably put to the ground.
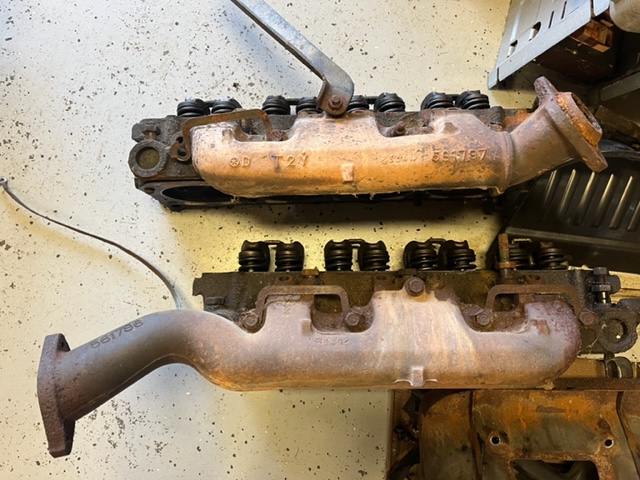
You're best bet is an Olds small block. The 307/350/403 are virtually identical externally, and will bolt right up to the stock trans. Displacement is cast into the side of the block below/behind the exhaust manifolds.
A Cad 368 will also work if you find an 80/81 FWD parts car, though if you're pulling an engine from an '81, be advised those have the V864 valvetrain/computer setup which adds complexity (you'll need both engine, ECM, cylinder controller, dash harnesses, etc.) A pretty involved job. An '80 isn't much easier. Because of that, This swap guide will focus on the Olds transplant. Remember, an Olds 350 has nothing in common with a Chevy 350, other than displacement.
Whichever Olds engine you chose, make sure it's from a FWD car, or you'll need to track down the additional FWD parts listed below to swap over.
I highly recommend buying a parts car, it'll end up cheaper in the long run, provide an ample supply of other body/interior parts you might want, and should still hold its value in scrap when you're done. You might even find it has superior suspension parts to swap over.
Bare Necessities from an Olds FWD (307/350/403)
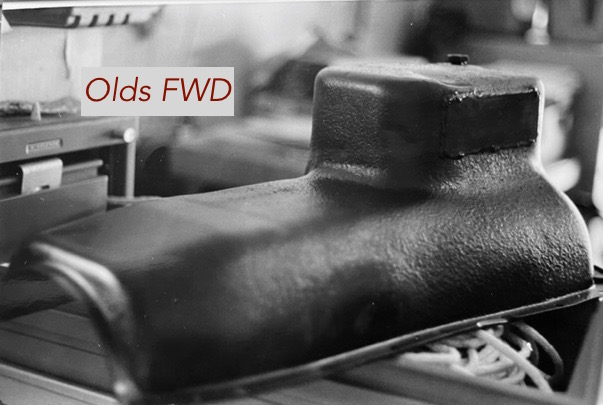
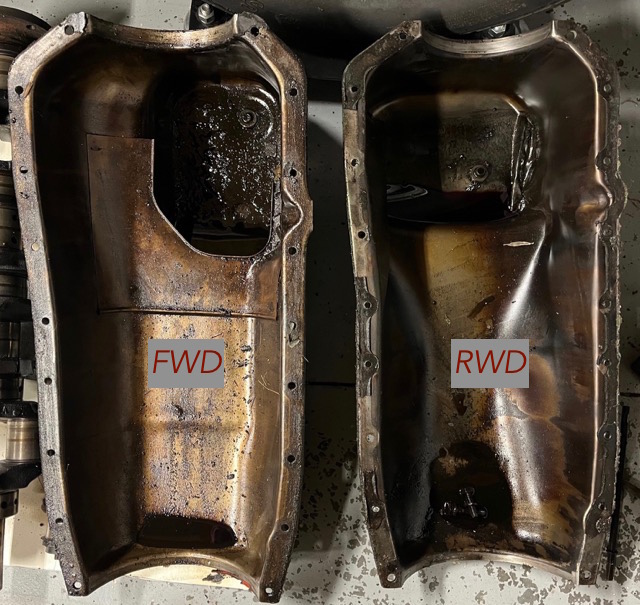
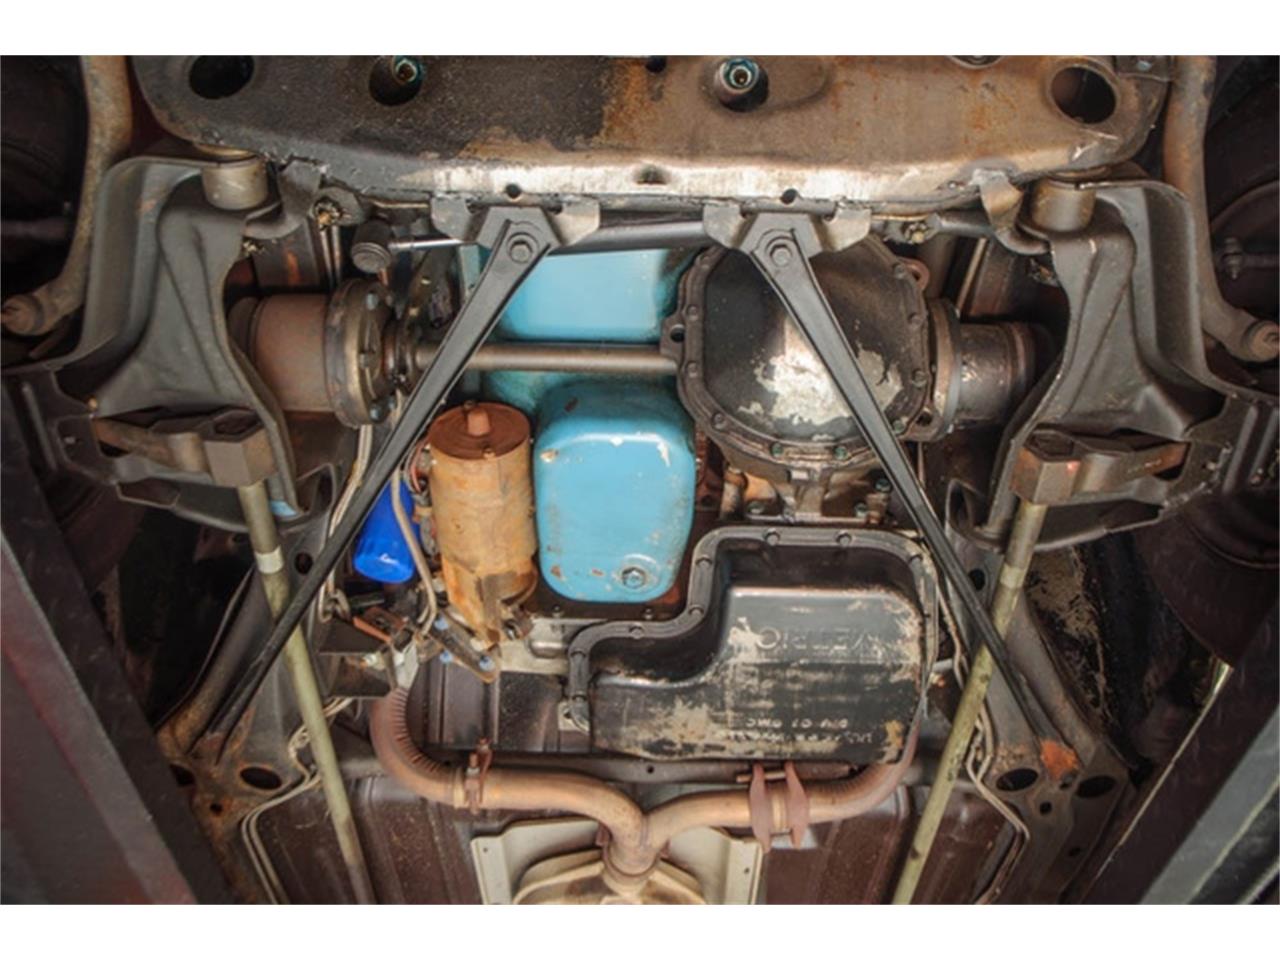
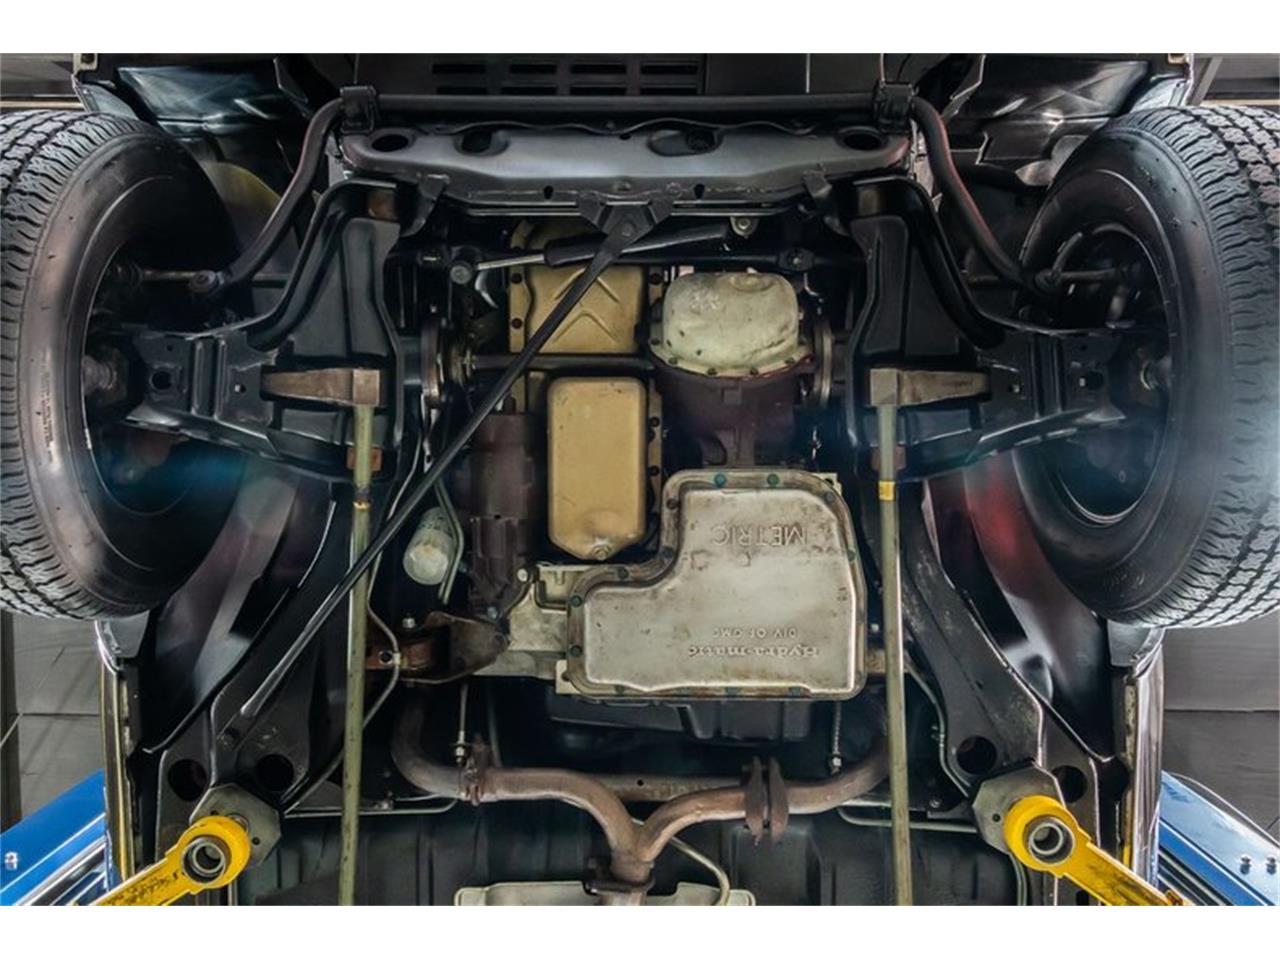
| 1. FWD Oil Pan, Pickup & Dipstick Any 79-85 FWD Olds block. |
|
|
| 2. FWD Olds Exhaust Manifolds & Downpipe Any gas 79-85 FWD Olds block for the manifolds. Gas or diesel will work for the downpipe / y-pipe. See Exhaust Section below. |
  |
|
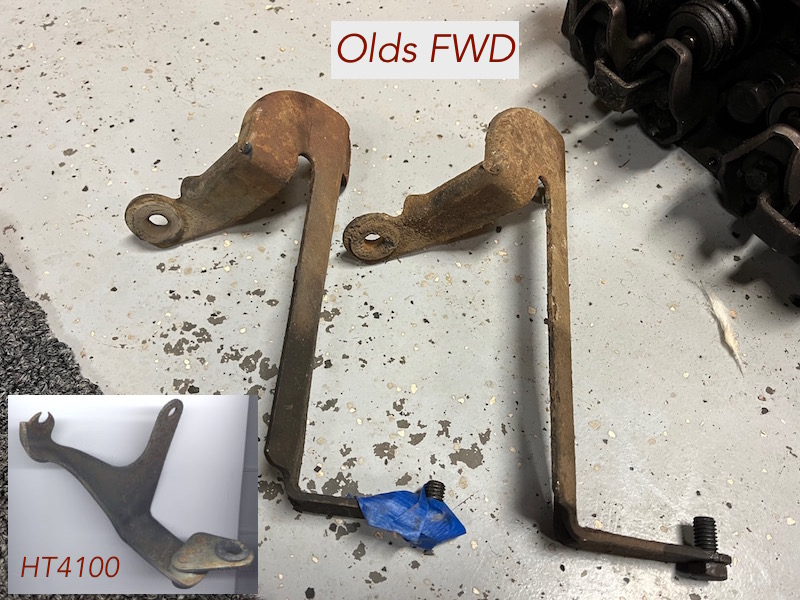
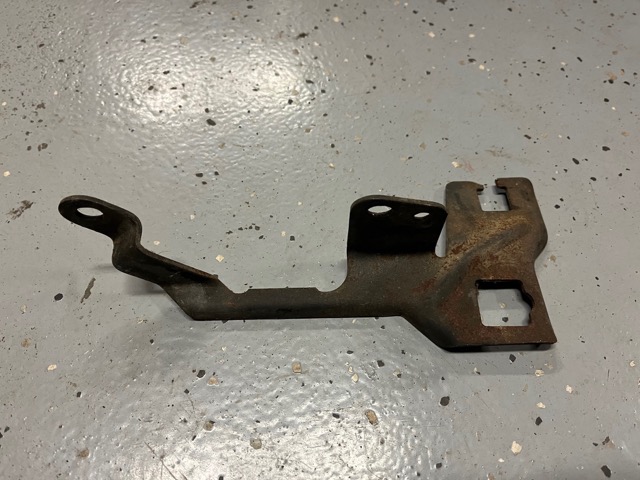
| 3. Shift Bracket and rod that mounts on driver-side rear of engine. Found on '79-only 350 Riv or '79-85 Eldo with Olds block, or 80+ Seville with Olds block. This includes diesels. 1980-85 Riv & '79-85 Toro do not work. |
 |
|
| 4. Olds Final Drive Support Bracket. Any 79-85 FWD E/K with Olds block including diesel. You may need to elongate the bolt slots depending on vintage of bracket. Pre-'82 mount flush to the block while the later brackets are pushed an 1/8" out to account for the new motor mount bracket. Shim with a washer. |
 |
|
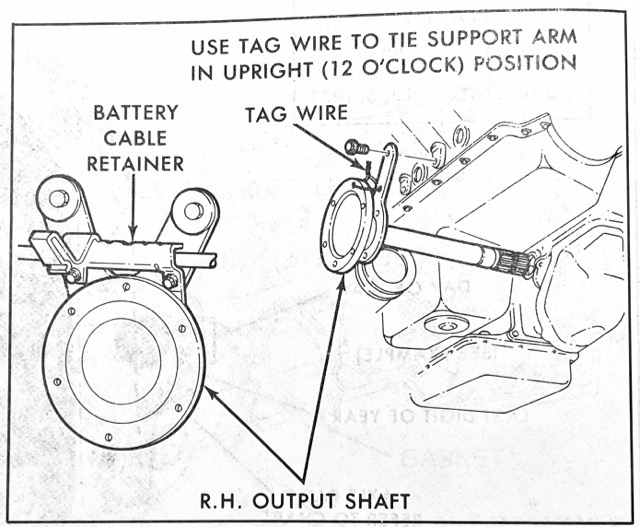
| 5. RH Output Shaft & Bracket Assembly Any '79-85 FWD E/K with Olds block including diesel. (4100, 368 and V6 will not work) |
 |
|
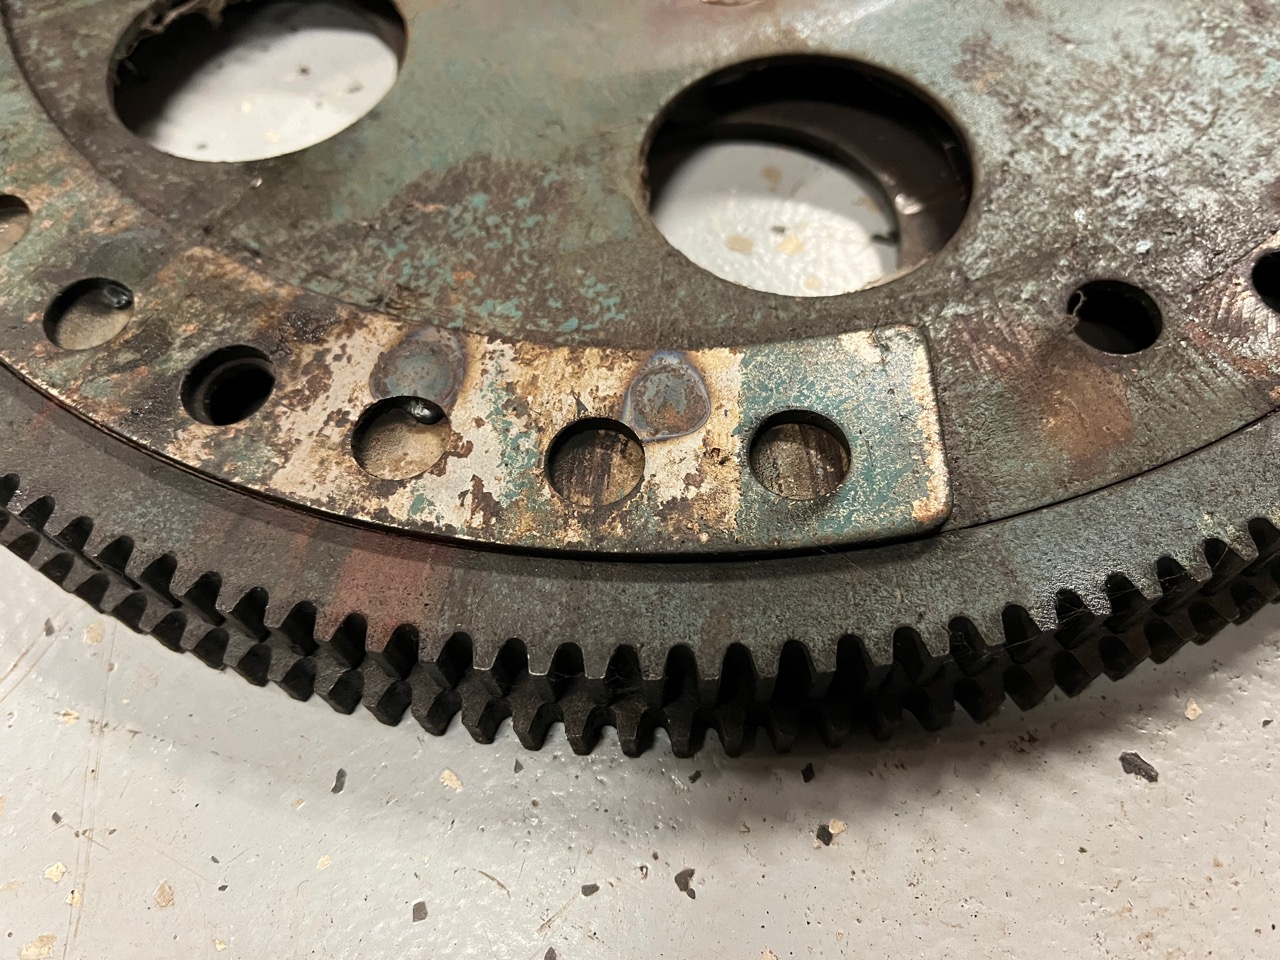
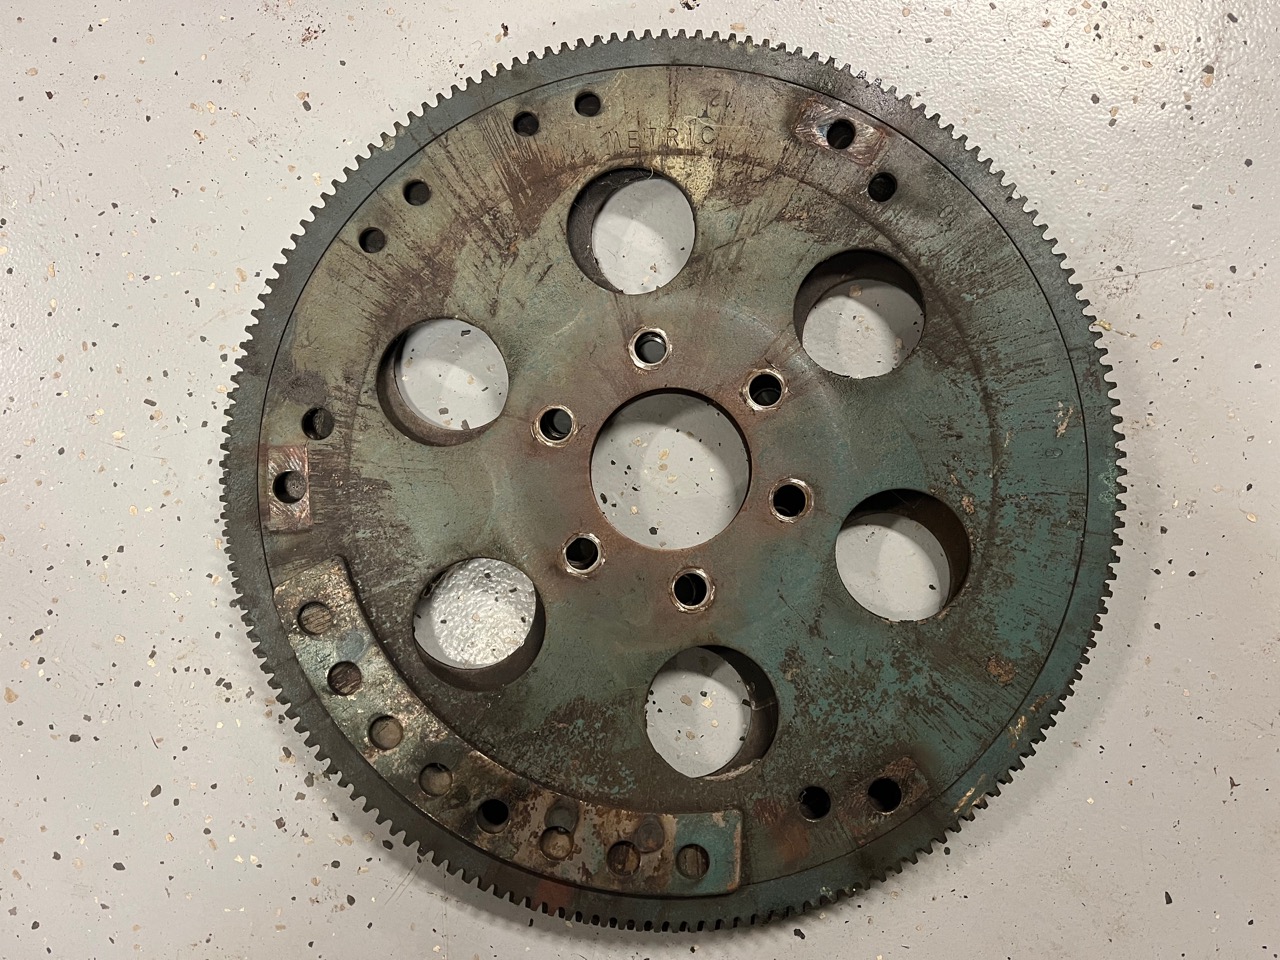
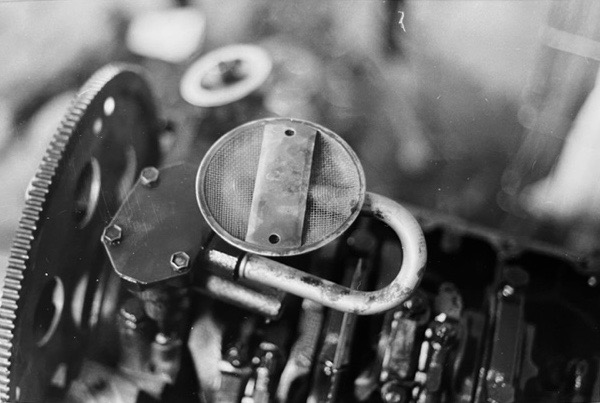
| 6. FWD Flexplate GM P/N: 562949. Any '79-85 FWD E/K with Olds block; diesels may be different. These were available new from internet sources some years back. Note slightly smaller diameter than RWD. |
  |
|
| 7. Carb Bracket for Throttle & Trans T.V. Cable 1980-85 Olds Shown at Right. See TV Bracket Section #11 below for details. |
 |
|
|
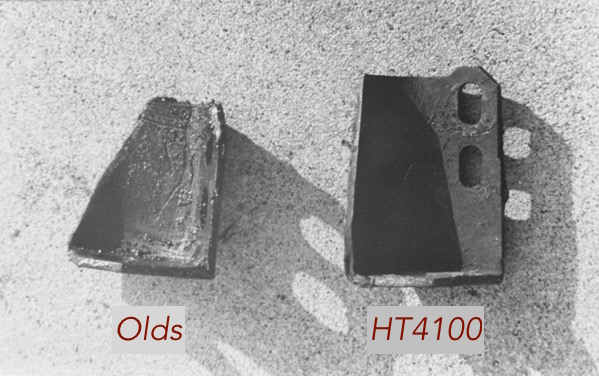
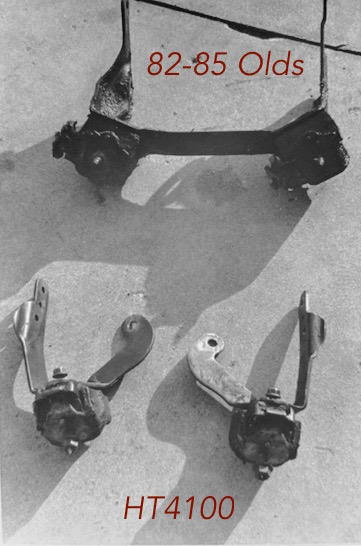
8. Front Engine Mount Support Bracket 1982-85 rubber mounts are the same L&R, but not compatible with the 4100 or earlier Olds brackets. HT4100 will not work at all. |
 |
|
| 9. FWD Oil Filter Mount Make sure you use the matching gasket as it's different from the RWD version. Any 79-85 FWD Olds block. Some have threaded cooler ports for an external oil cooler, some do not. |
 |
|
| 10. Power Steering |
1980+ GM cars use a steering gear that takes metric o-ring -AN6 fittings. You can also move the metric 4100 pump over to the Olds bracket, but that's a bit The Olds PS pump brackets mount to 2 studs on the front cover, and the front- |
|
| 11. Brackets & Cables |
The 4100 transmission TV cable is too short b/w eyelet and mounting flange. The 4100 accelerator cable is too short to reach the Olds carb/TBI; as mentioned |
|
| Optional: Fan shroud if needed, Y-Pipe/Down Pipes to save time/money on exhaust (these are NLA), engine harness from donor, radiator/mounting parts if going larger. |
-A '79 Eldo fan shroud and cap will bolt right up to the '85 header. |
No single donor will have everything you need, but an '82-85 Riv or Toro parts car will get you pretty close. Of course, there are plenty of 'gotchas', and you might already be sitting on a box of Olds parts, so here are some things to consider....
- INTAKE MANIFOLD: Any FWD/RWD Olds 307/350/403 stock intake should work. Out of the box, an Edelbrock Performer will sit too high once a carb and air cleaner are mounted. First gen Seville & '79/80CA Eldos have multiport intakes that will also work if going with EFI; be sure to grab the matching air cleaner, offset lid stud and spacer. The early version of this intake is cast iron but has larger bores. The later is aluminum, but corrosion can be a problem. For air cleaners, the EFI cars do NOT have thermac valves but will fit a carb.
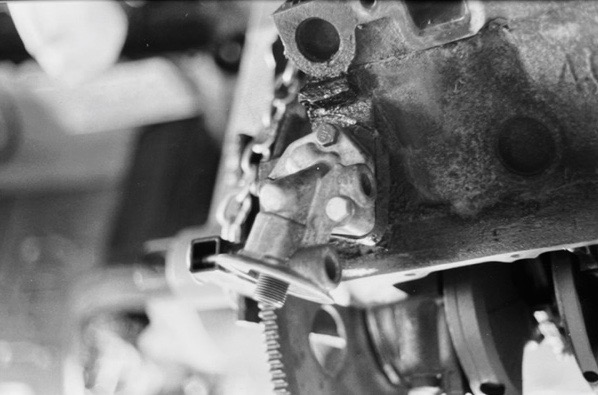
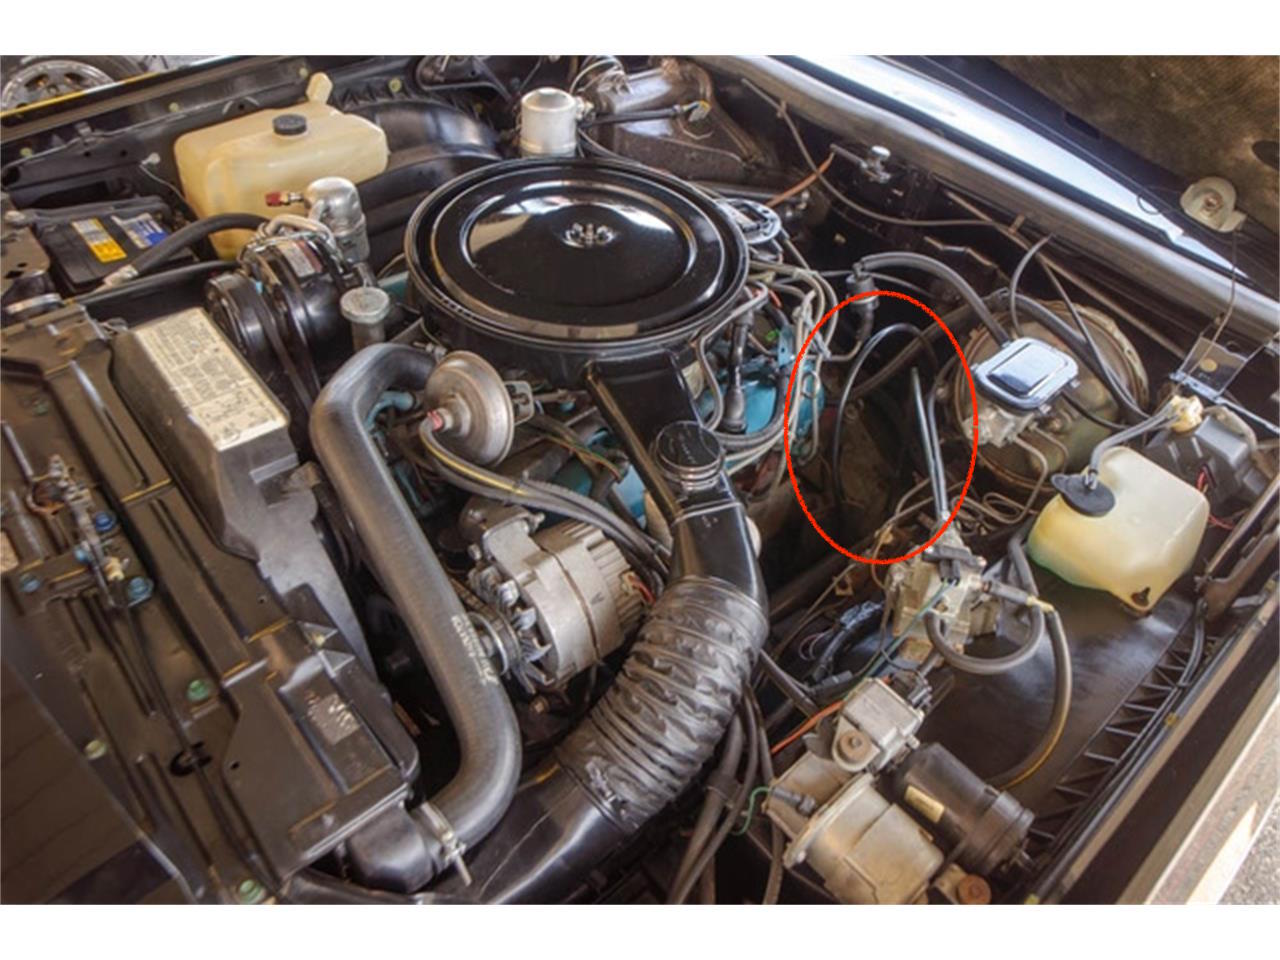
- HEATER PIPE NIPPLE: Located at the rear passenger corner of the intake, Cadillac used a passive threaded nipple and their vac-operated hot water valve was hose-mounted inline. The diesel cars, and Olds version, typically used a combination valve that was part of the nipple, often with a provision for a blower motor turn-on switch. Either will work, but you may want to simply reuse the 4100 inline valve and grab an NPT nipple at the parts store/home center. The blower turn-on switch is incompatible with the 4100's climate control anyway, so no advantage using the Olds part there.
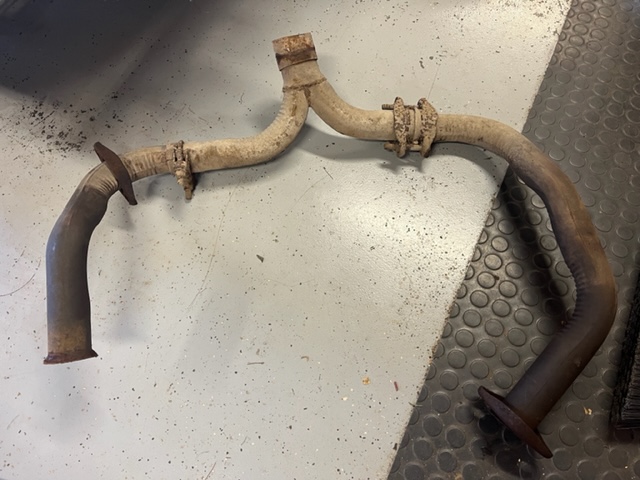
- EXHAUST: The HT4100 Y-pipe diameter & arrangement is very restrictive; you'll need to use the donor car setup. Somewhere along the line ('84?) the old bed-style cat converters were changed to the smaller compact type. The bed-type uses an angled inlet, so some exhaust work may be necessary if you're using the earlier Y-pipe arrangement with the later version cat, or vice-versa as alignment is slightly off. The down pipes / Y-pipe assembly is no longer available new, so try to find a good example, or fab will be necessary.
The Diesel exhaust will bolt-up and is a larger diameter which also eliminates the cat. I recently pulled one from an '83 Eldo and it appeared to take into consideration the offset inlet. Diesel exhaust manifolds are completely different and best avoided. Diesels and the EFI cars do not use a butterfly valve in the exhaust for warmup.
- ALTERNATORS: Diesels & the EFI Cadillacs use an 80A alternator, a nice upgrade. To make this work, you need the matching brackets. And because the alt body sits higher, you also need the matching air cleaner or the snorkel will interfere. Just an FYI, the EFI car snorkels do not have thermac valves, and the diesels are a different incompatible style, altogether (all together). I suspect a RWD Olds with heavy duty charging would have a thermac-equipped compatible air cleaner. The thermac is probably not needed unless you do a lot of winter driving.
- TRANSMISSIONS: Since you're converting an '82-85 HT4100, these all have 4-speed transmissions. If you really want to put the THM-325 3-speed in, I suspect you could swap the rear trans brackets to match the 82-85 frame which uses donut mounts. The 4-speed will need an electrical connection for torque converter engagement. See the Electrical Swap section for details. Furthermore...The 1981 trans has a "3rd Gear Output" switch for the V864 MD system. (*1981 V6 cars supposedly have a 325-4L)
Some will argue with the 325 is stronger than the 325-4L (200-4R). Yes, concessions were made getting the OD and TCC in a similar-sized package, but both have their vulnerabilities. A shift-kit is a must for either.
The '82-'85 4-speed is slightly different between diesel and DEFI. Besides different torque converters, the DEFI trans has a switch that opens when in 4th gear to let the ECM know when it's ok to engage the TCC. The Diesel cars have a governor output that closes above ~40MPH. Most aftermarket lockup controls are compatible with either.
- BRACKETS: Final drive support bracket and the RH output shaft/bracket were covered in the intro section; if it has an Olds block and it's FWD, they're basically all the same. A TV (throttle valve) cable is required for the trans to operate correctly, and should be matched to whichever bracket you're using. If running the EFI intake, use the EFI bracket arrangement. If running a carb, an 80-85 Toro/Riv accel/TV bracket is your best bet. Be sure to adjust this cable correctly or trans damage will result.
The shifter bracket is another matter. '79-85 Toros use a cable shift, as do the '80-85 Rivs. It's a superior system but requires a steering column swap to take advantage of it. Otherwise, you need a bracket from a '79 Riv, a '79/80 CA Eldo, or a diesel FWD Eldo/Seville. Here's the Cable-Shift setup.
|
Now, about those Donor Cars
- 79 Eldo has an Olds 350 and is pretty close to a direct swap, except it originally had EFI, the same system as used on the 1st gen Sevilles. You can use a compatible small black Olds carb/intake and call it a day (and a lot of these have been converted). Or, if you want to keep the EFI, you have a couple options. The harness unplugs at the firewall, and you could get out the soldering iron and extend it to use with an aftermarket system like MegaSquirt (see EFI section). You could also retain the original analog EFI computer, but because the harness is integrated into the dashboard wiring, grabbing a standalone harness from a 75-79 Seville would make life easier. The Seville harness connects directly from the engine to the ECU through a dedicated firewall grommet and is virtually plug-and-play. CA-Spec 1980 Sevilles and Eldos also have this drivetrain, but use a different ECU and an O2 sensor. See Tech Info Page for ECU P/N's. You will need to drill your front crossmember for the front motor mount spacing on the '79, and you'll want to use your existing trans. If you use the old 3-spd, then swap over the rear mount brackets.
- 79 Toro/Riv: Will have a carb'd Olds 350 if not diesel and not turbo. Everything should swap over like the Eldo. The Riv will have the correct shift bracket. Both have the old style motor mount brackets.
- 80 Toro/Riv could have either a 350 or 307. Check the emissions label or better yet, the displacement will be cast in large numbers on the side of the block near the freeze plugs.
- 80 Eldo: Cad DEFI 368 unless ordered for CA emissions, in which it's an Olds 350 w/EFI (see '79 caveat above). If you really want a 368 without the EFI headache, you could use the carb/intake from an '80 RWD Cad. However, this guide does not cover that swap.
- 79-85 Eldo/Riv/Toro/(80+)Seville with a Diesel. Has many good external mounting parts, especially if 1982+. This includes the cruise module if it's a Cadillac (even RWD). But the diesel T.V. Cable bracket is different compared to the carb version, and the shifter caveat above applies to the Toro/Riv. I'm told the diesel flexplate is different, but haven't confirmed. The Diff bracket, RH output shaft and oil pans should swap.
- 77/78 Toro: Good source for an Olds 403, but the FWD parts are different than 1979-85. Note: these engines have a computer for spark control and a crank trigger. You can drop in a standard Olds HEI and omit the rest of that system if you desire. The spark curve of a 350 distributor will greatly improve the 403's running.
|
||
| Note: HT4100 has smaller exhaust pipes; both feed offset cat inlet until debut of smaller inline cat. |
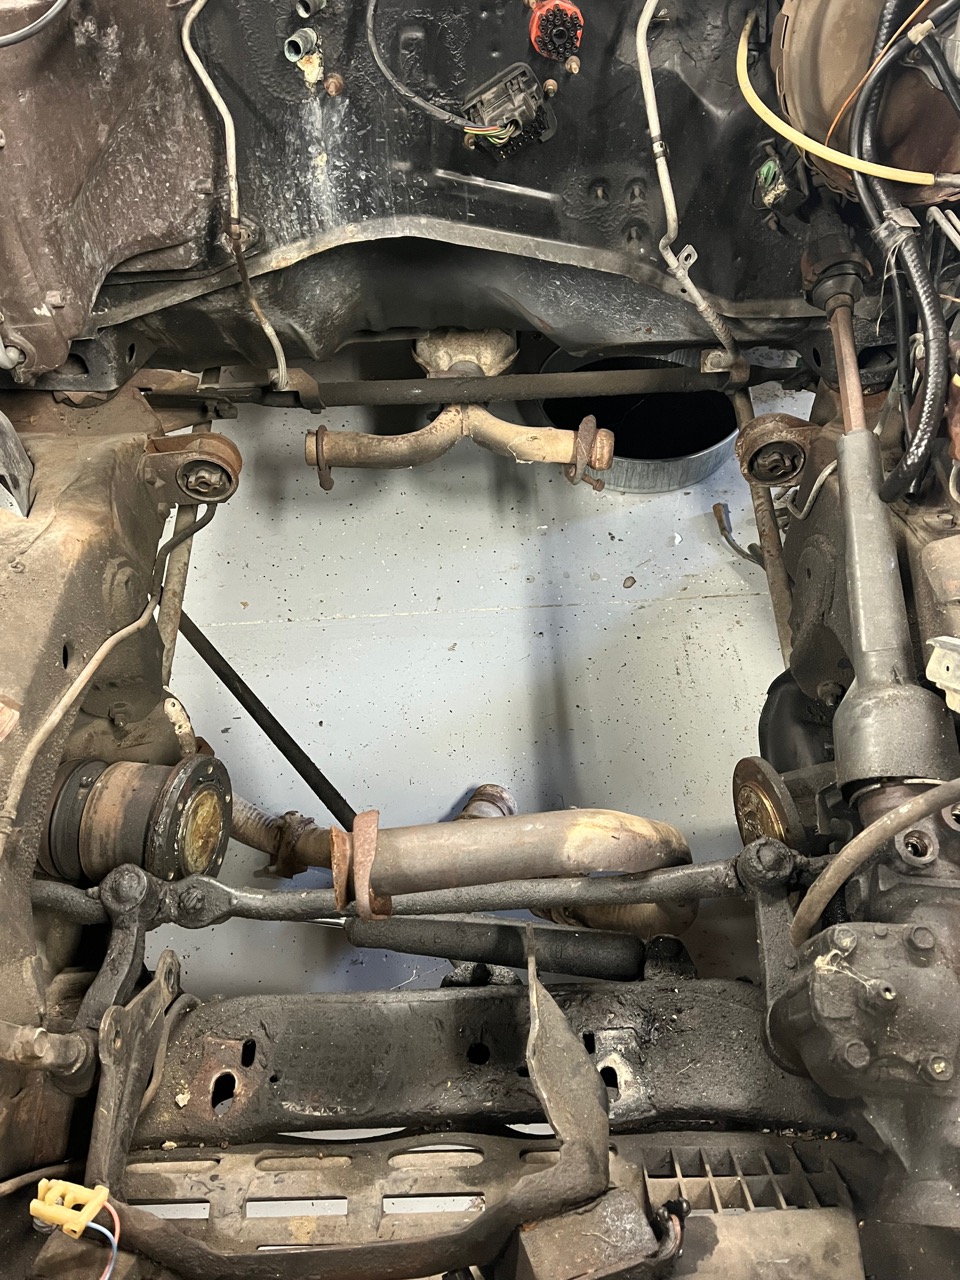
- Now is a good time to figure out your fuel line strategy. The trans donut mounts make it difficult to route fuel lines to the engine while avoiding exhaust heat, and the passenger side is especially close to the exhaust manifold with the offset engine. The 4100 cars run supply along the driver's side, and return & evap on the passenger side. Evap then crosses under the engine and pops up adjacent to the charcoal canister.
For a carb conversion, I retained the 4100 flex line, adapted to couple with new hard lines up over the intake to the mechanical pump. The mechanical pump will pull fuel through the old in-tank pump, just be sure to remove the fuel pump fuse and relay. For a 40 PSI EFI conversion some years ago, I relocated the fuel filter to just foreward of the gas tank where the rubber hoses connect, and mounted a high pressure pump in place of the old filter. Using the old stainless flex lines at the engine is a gamble; it's preferred to bend up some new steel lines tucked close to the frame and inner fender, and use high pressure rubber hose up at the front of the engine.
- Final drive ratios on these cars are all over the place depending on the original engine, trans, year and optionality. You can mix and match for your preferred package. '79 is as numerically low as 2.19:1, while an '85 Eldo can be 3.15:1 (3.36 in a T-Type Riv!) to take advantage of the OD trans. When in doubt, look for the buildsheet, or the stamped code on the final drive 'tab'. Speedometer error can be addressed by a combination speedometer-driven-gear swap and an inline speedo cable gearbox. See the Tech Info Page for details on codes and gear colors.
- The rear trans donut mounts are actually bolted to the frame from the outside, with square nuts welded to the flange itstelf. Gaining access to the bolt heads requires removal of the inner fenders (only practical if pulling the front end apart). Or drilling a couple of 3/8" access holes in the fender liner to slip your ratchet extension through.
- Riv T-Type: I excluded these from above as they're a special breed you're not likely to find as a cheap parts car. These have turbo 3.8L V6's. If a guy wanted to swap everything over to an Eldo, I don't see why it wouldn't work, but have no useful info to add.
- The Buick 4.1L V6 was offered on all 3 E-bodies (and RWD Cads) from mid-1980 through '82, and other than the cruise module (Cadillac only), would be quite worthless as a parts car. Word is that the V6 cars got the 4-speed trans prior to 1982. Would be interesting to prove/disprove that.
- 81-up Toro/Riv use a computer carb. Not a bad system once understood, but you'll need the wiring/ECU if you want to retain it.
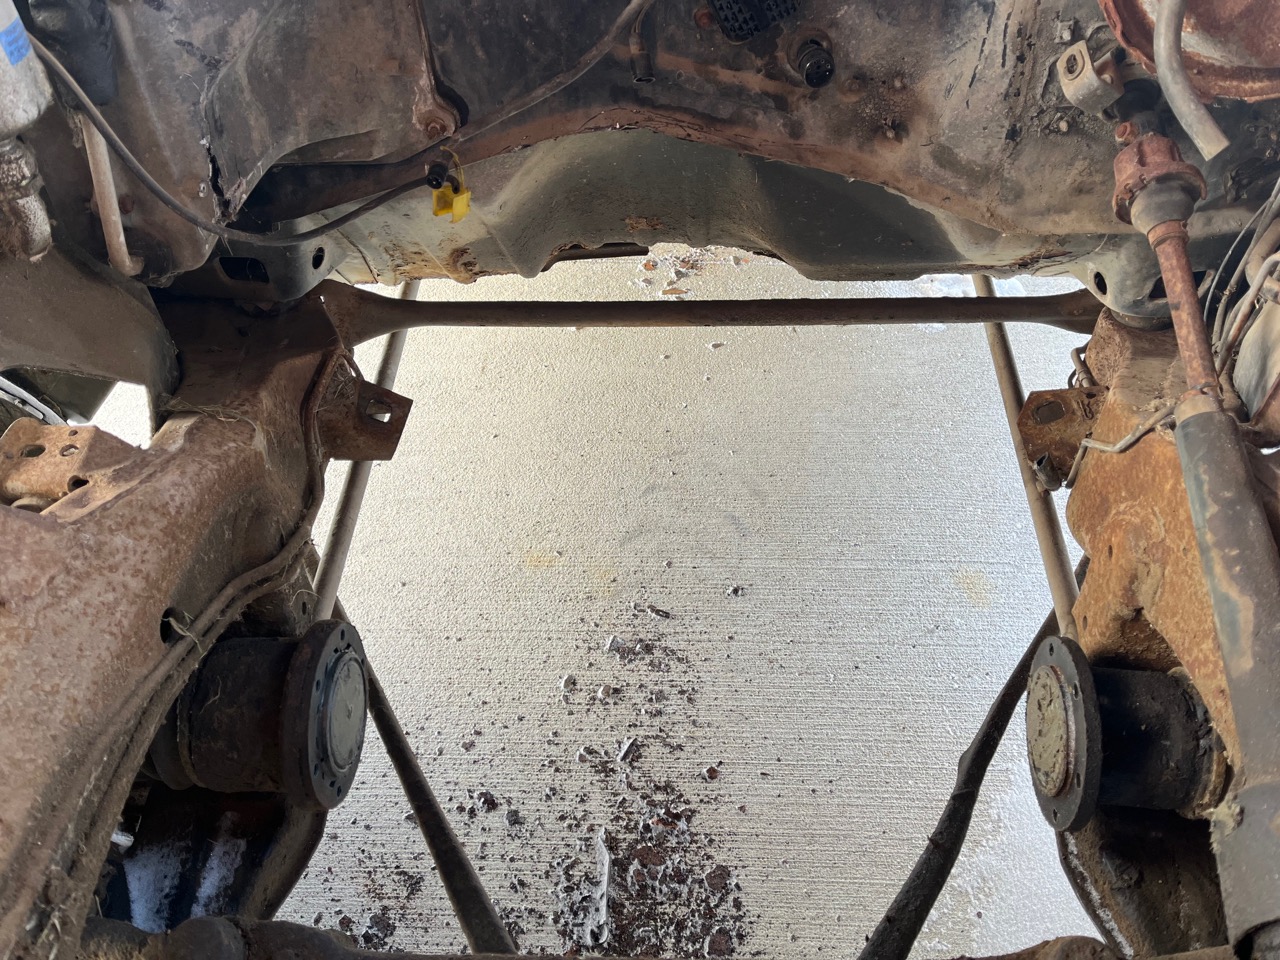
- The front engine mount bracket changed in '82. The 4100 uses a pair of L-brackets that attach to the front cross member. Ditch those in favor of the Olds U-shape bracket from 82'-up which'll fit the 307/350/403 and the studs will drop into the existing holes. If you find yourself with a 79-81 bracket, it will fit the block, but you'll need to drill new holes in the cross member as the stud spacing is different. I like the U-bracket as it mounts to the sides of the engine rather than blocking the front cover. The matching motor mounts use single bolts and are the same p/n for L or R.
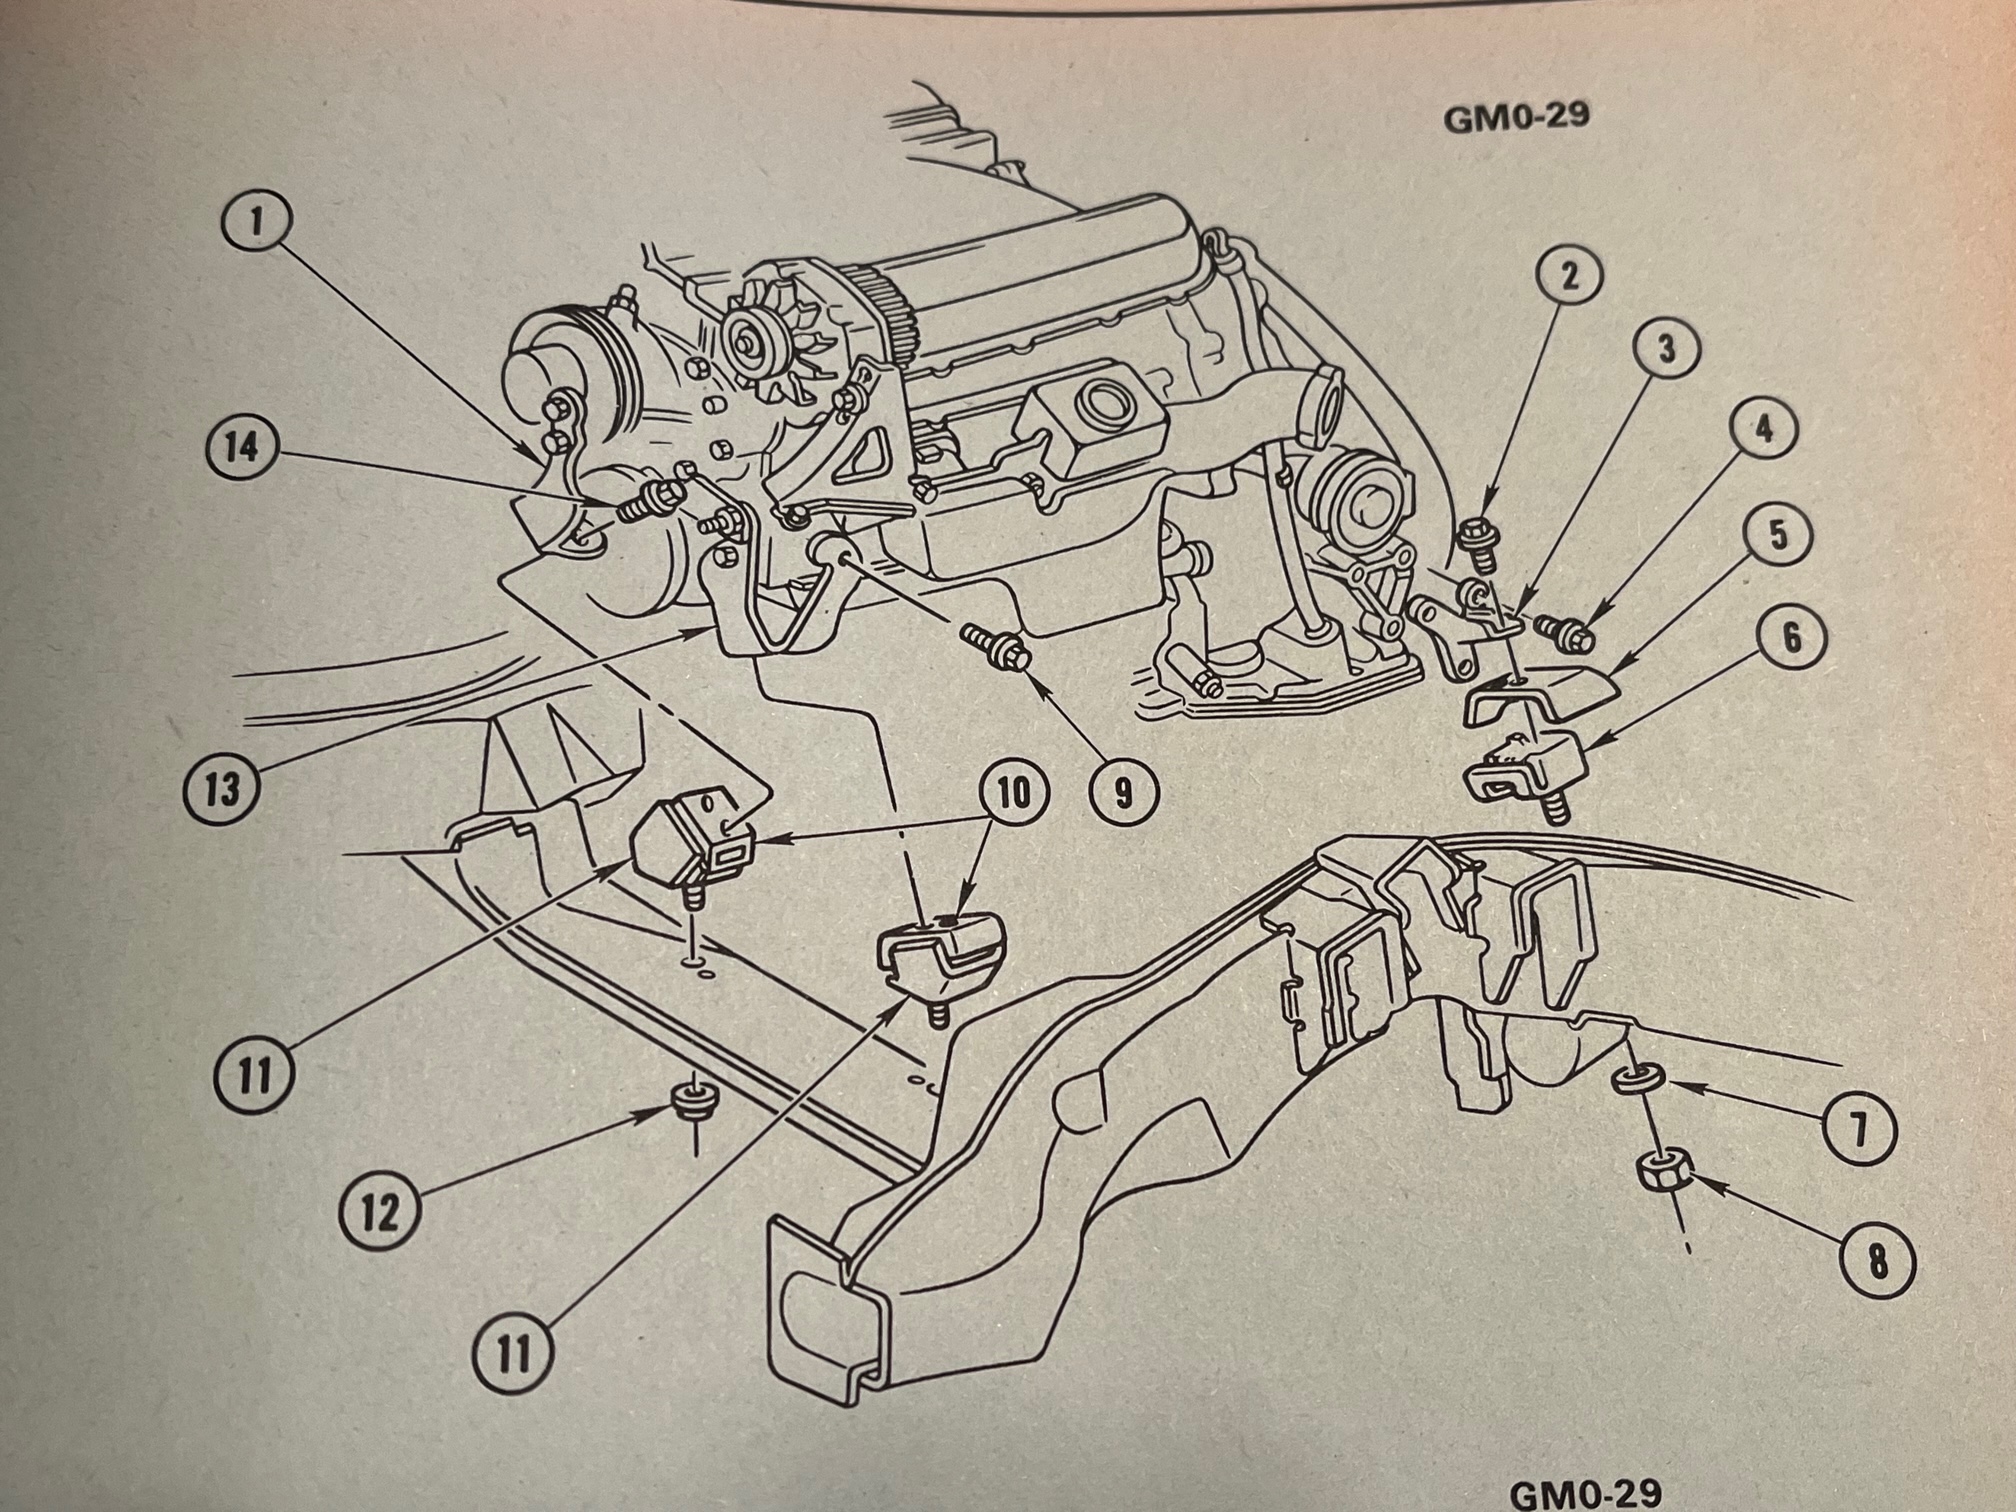
1979 Eldo Olds 350 Bracket Arrangement - Cad Parts Book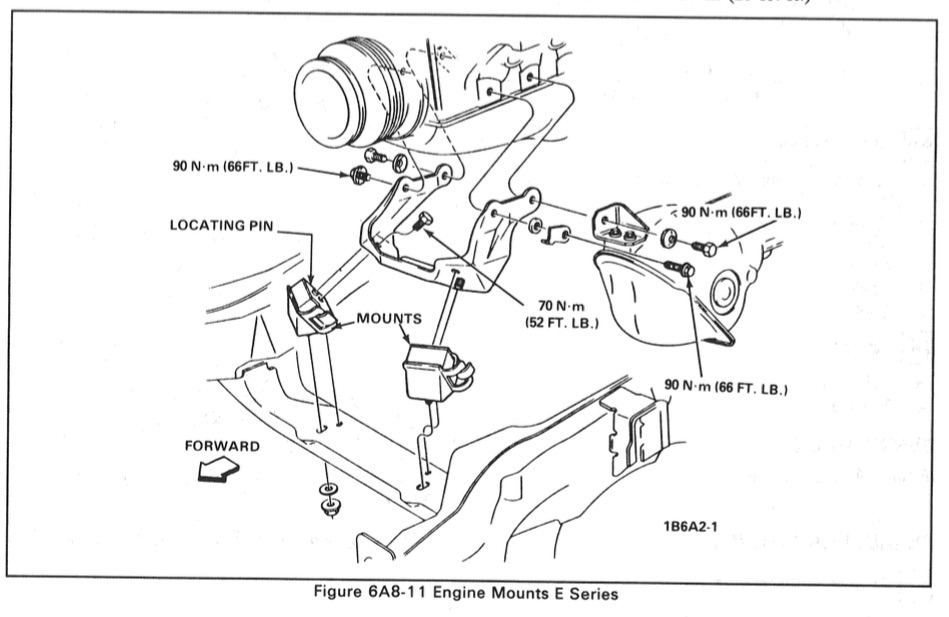
Olds 350 Bracket Arrangement - 1984 Buick Shop Manual
| Click Here for PART 2 - Engine R&R |
Return to Main Page Comments? Corrections? Contact Webmaster Cory Heisterkamp 2022